Welcome back to Instant Tech Guide! I'm back with a new stunning tutorial how you can make fire effect in text in Photoshop. This whole article is related to Photoshop. If you are a beginner and unable to use Photoshop then you will get the complete guide here. I'll teach you the complete usage of Photoshop. After reading the whole article, you will be able to create a fire text in Photoshop. So, follow me in this regard to do so. First of all, you'll have to write a text and then add fire to it. The text will look like it is burning with fire. If you are going to add fire to text then Photoshop is the right option for this type of work.
*STEPS TO ADD FIRE EFFECT IN TEXT IN PHOTOSHOP*
I'm going to share all the steps with snapshots through which you can add fire effect to text in Photoshop. Follow these simple steps to do so.
STEP 1:
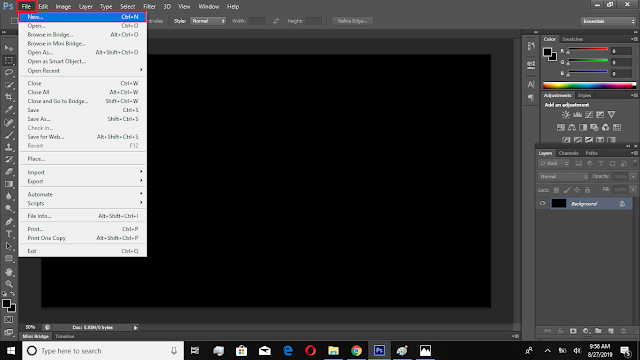
First of all, you have to run your software in order to do your work. Once, your Photoshop has started, you should create a new document as it is shown below in the screenshot. You can also press "CTRL+N" as well to create a new document as shown in the given screenshot.
STEP 2:
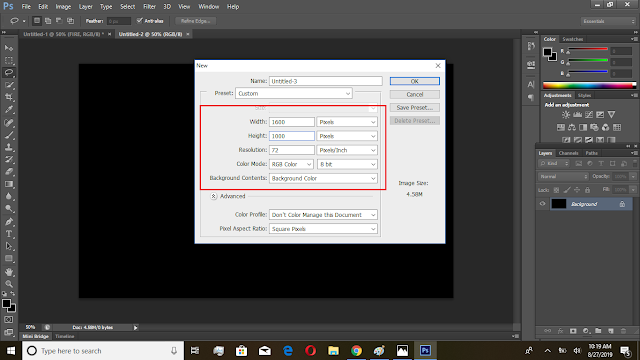
Now, you have to provide dimensions to your document. You can choose the dimensions by your own. But if you are worried and unable to do so, you can follow the below screenshot as well to provide dimensions to your file.
STEP 3:
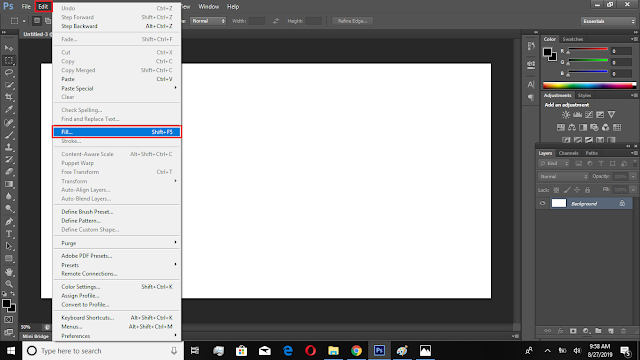
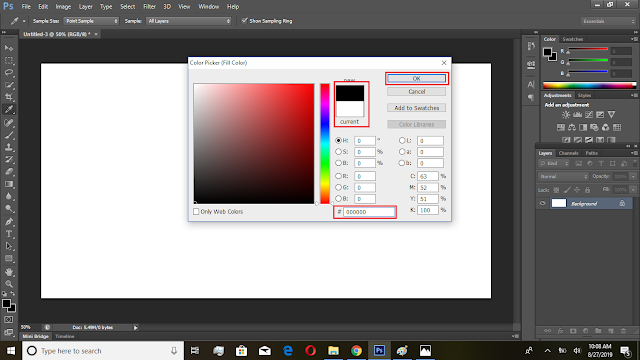
Once, you have provided the dimensions to your file, you need to add background color to your new file. In order to provide background color, you have to navigate to the EDIT to upper menu and then click on fill to give proper background to it as it is shown below in the given picture. You can press Shit+F5 as well to do so. For this purpose, I'm going to provide you three screenshots through which you can better understand.
STEP 4:
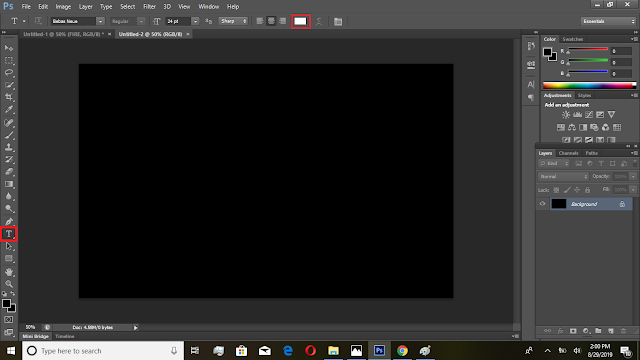
Now, you have to select the text tool in order to write some text. You have to write the text whom you want to give fire effect. You should select the white text for your text as you have selected black background. Follow the given screenshot:
STEP 5:
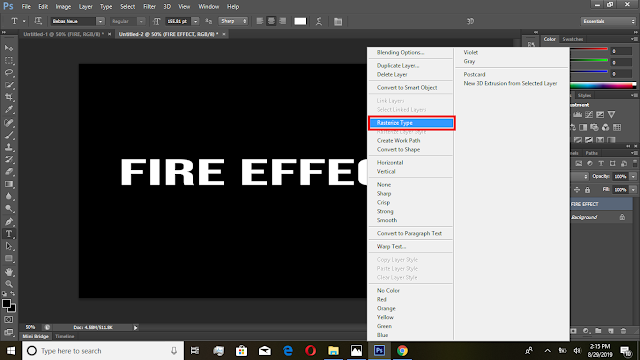
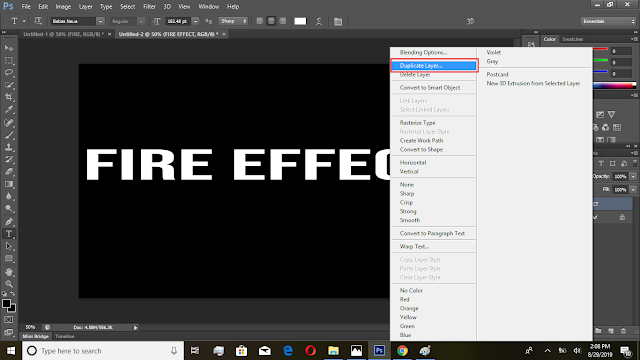
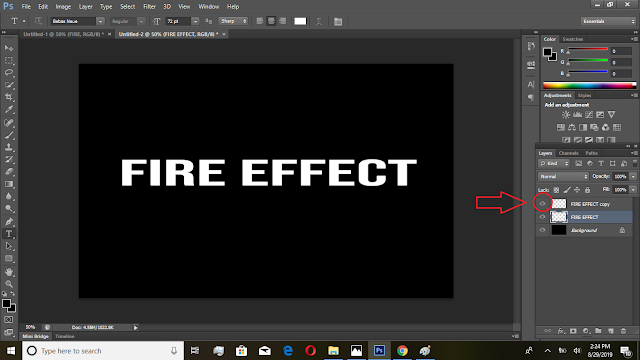
When you are done with writing your text, you need to right click on the text layer in the layers section and click on Rasterize Type. Now, you need to duplicate the layer by right clicking the text layer and on duplicate layer as shown in the screenshot. When you have duplicated the layer, turn off the visibility as shown in the 3rd screenshot.
STEP 6:
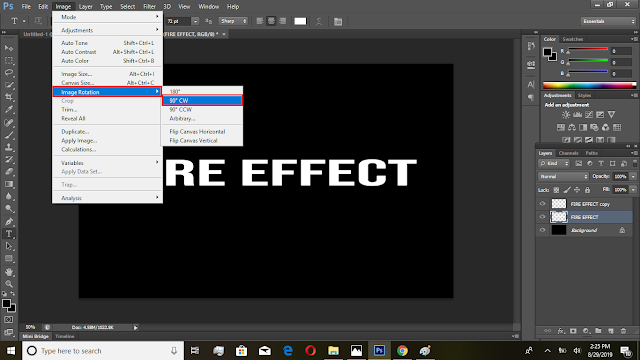
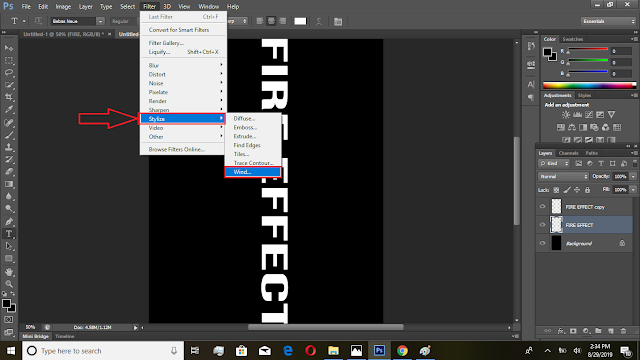
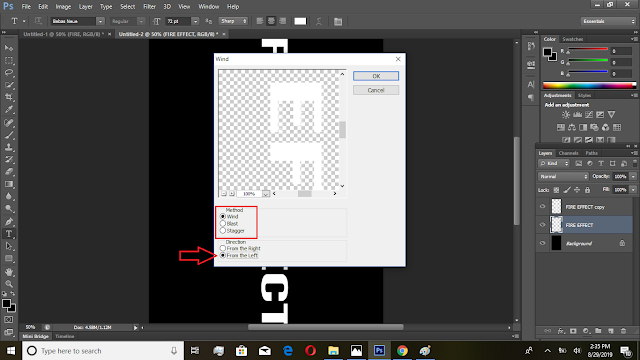
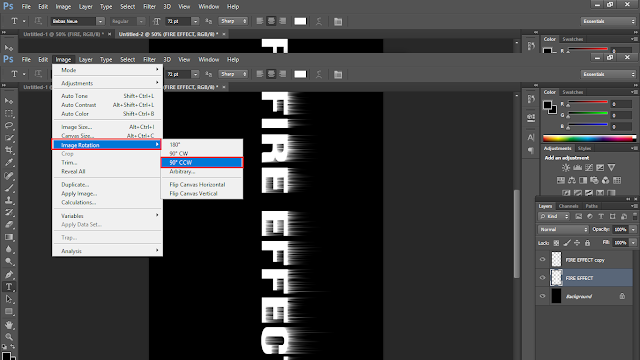
You have to rotate the text in order to apply filter to it. You have to rotate the image by visiting the Image section in the upper menu and rotate the image to 90 degree clockwise. After rotating the image, apply the filter by visiting the filter section in upper menu. Apply the same filter as it is shown in the snapshot. Remember, apply this filter for three times in order to give better look.After applying the filter, rotate the image to 90 degree counter clockwise.
STEP 7:
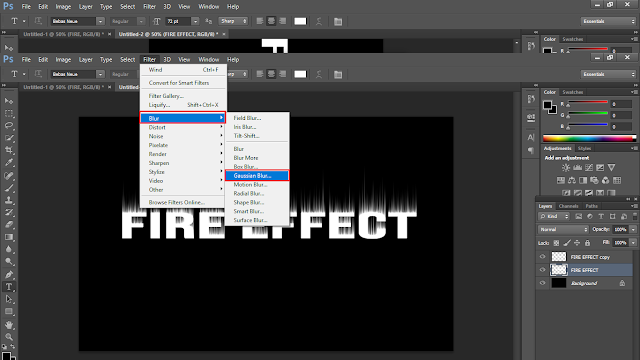
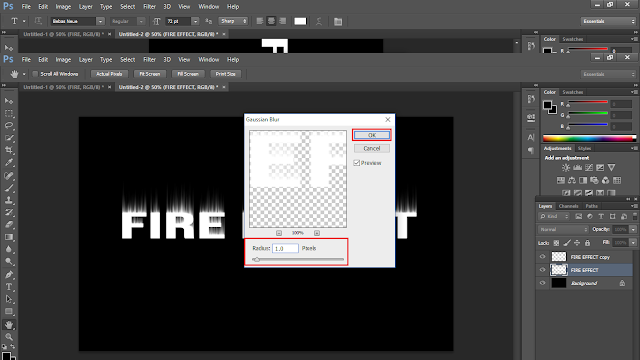
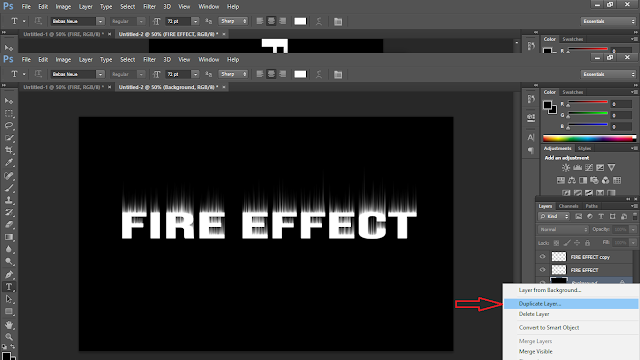
Now, you should apply the filter named as Gaussian Blur. Select the radius 1.0 for this purpose. After applying this filter, duplicate the background layer by right clicking on background layer. Follow the below snapshot.
STEP 8:
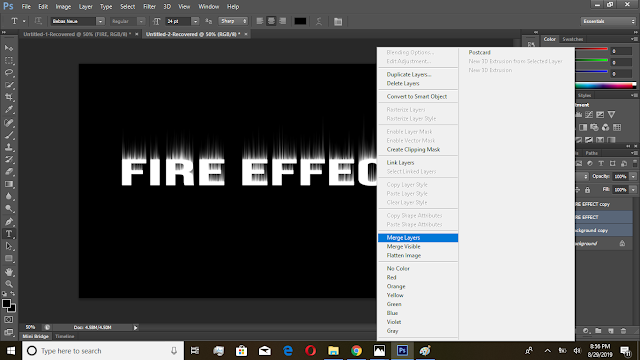
Now, you need to merge the two layers named as Background Copy and your text layer. Highlight the both layers by holding CTRL and merge these layers.
,br />
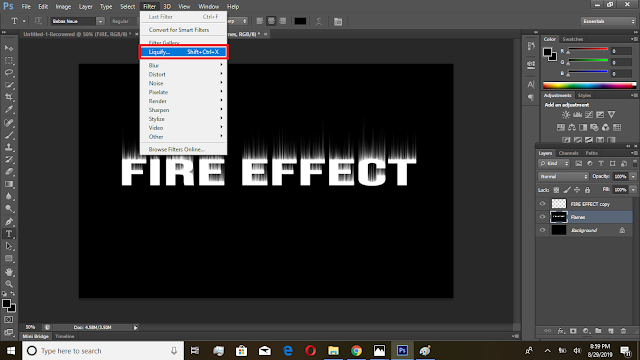
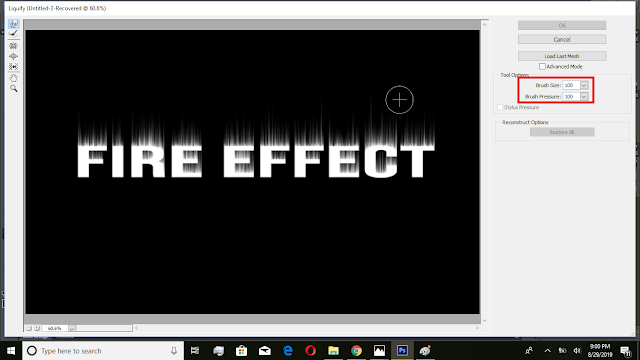
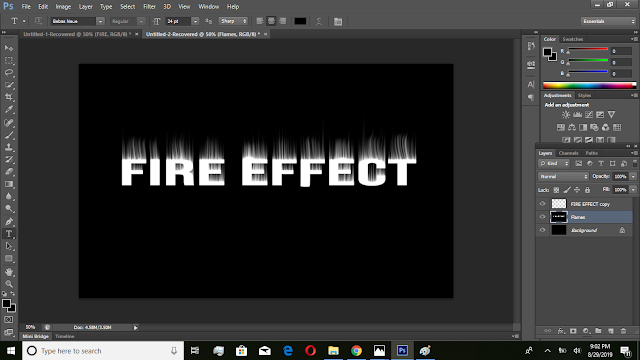
You need to apply the filter liquify to this layers. Select the size of brush and drag your mouse up to give spikes to your text.
STEP 9:
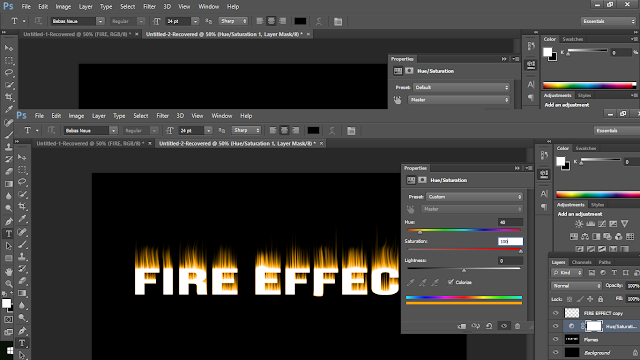
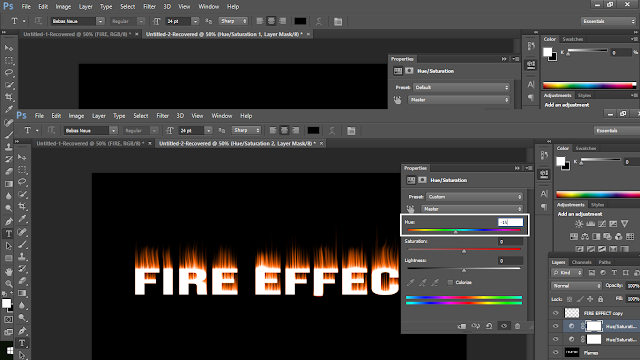
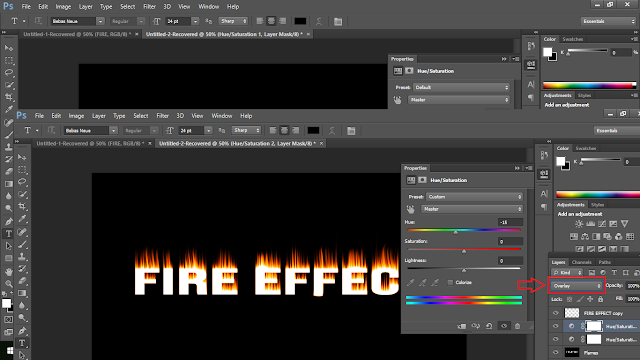
Add Hue/Saturation layer from the bottom of layer sections by following this snapshot. After adding this layer, you need to add another same layer by changing the color formats as shown.
STEP 10:
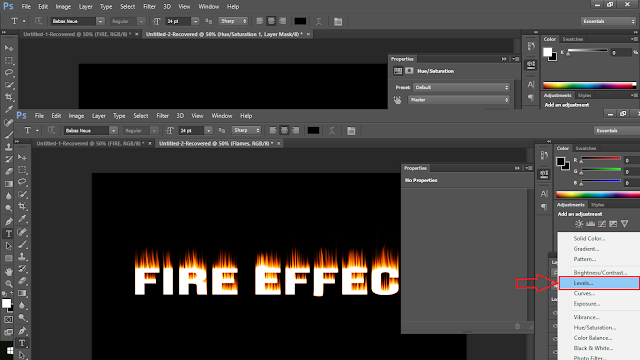
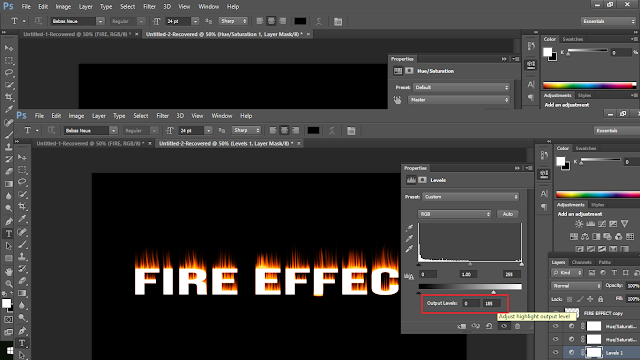
Now, you have to add another layer named as levels from the same sections we have added Hue/Saturation layer and add following properties to it.
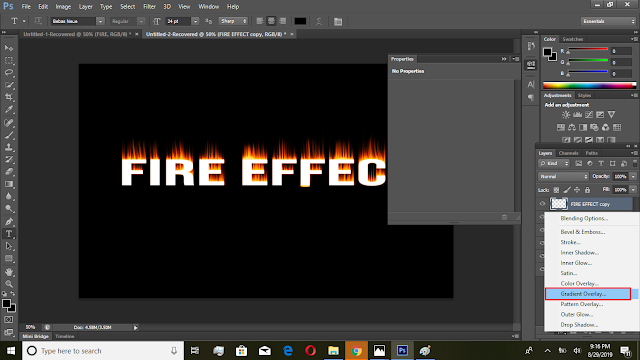
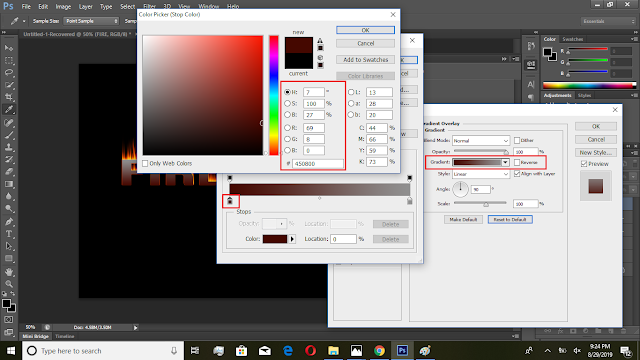
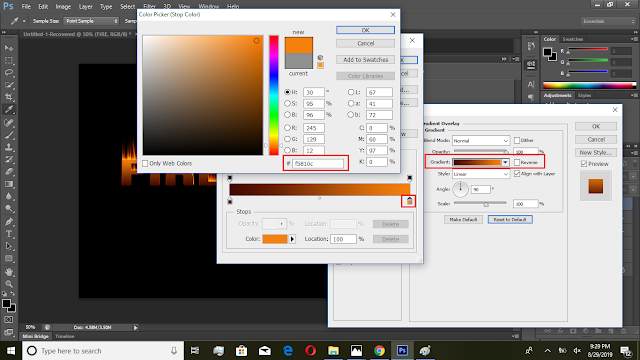
Now, you need to select the copied text layer and add following properties to it. You should add Gradient Overlay layer through fx icon in the layer section and do some changes as shown below.
,br />
STEP 11:
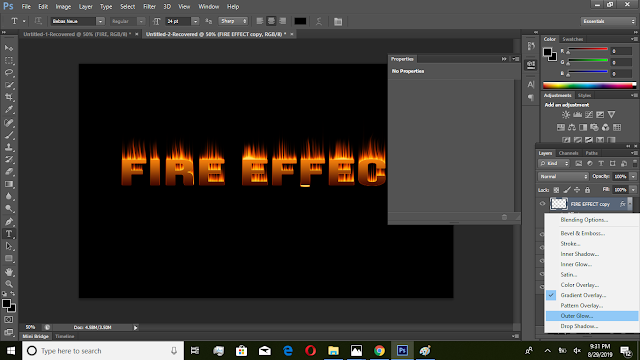
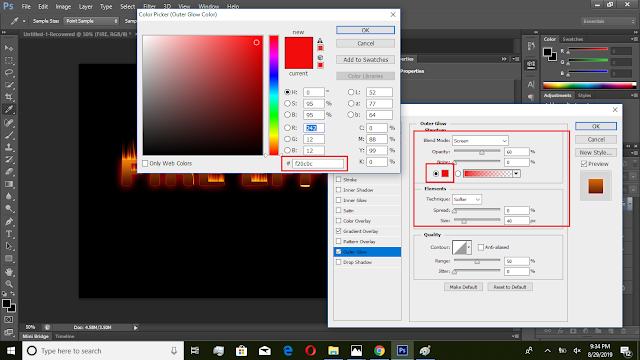
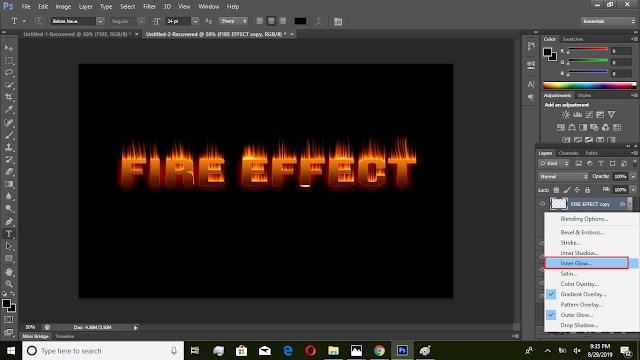
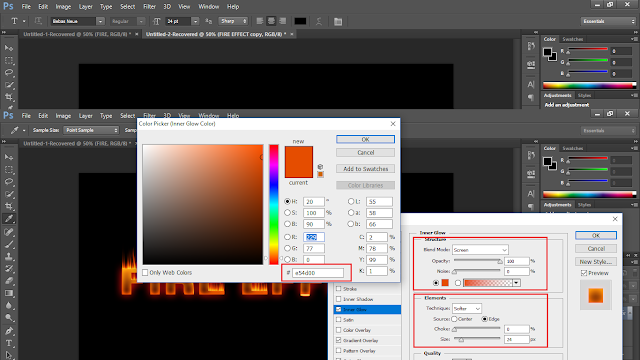
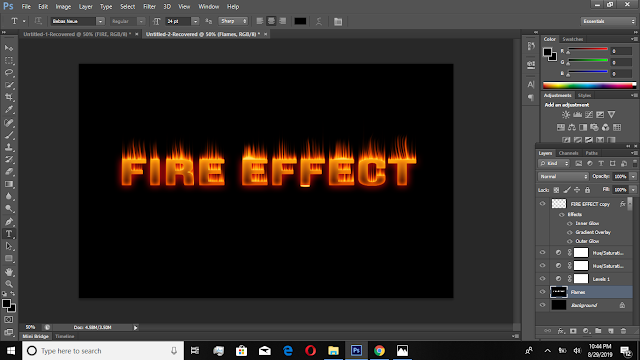
Add Outer Glow by right clicking the copied text layer and make changes as given in the picture. After adding the Outer Glow, add inner glow to the copied text layer.



0 Comments
Post a Comment